If you have a file that was generated outside of your CHAMP Encoder, then chances are you will need to convert the file into a web-friendly version. The most common way to do this is via the free and Open Source software Handbrake.
Install Handbrake
Step 1: Install Handbrake
If you don’t have Handbrake already installed on your computer, you’ll want to go to their web site at https://handbrake.fr/, download the version for your computer (Windows/Mac/Linux). After you download the program, go through the install routine to install it on your computer
Step 2: Import Preset
Now that you have Handbrake installed on your computer, the next step is to download and import the CHAMP HD preset. You can find the file here: https://champds.com/files/handbrake-profile.zip. Download the .zip file and then un-zip the file on your computer.
Next, launch Handbrake and do the following:
- Select “Open Source” and browse to the media that you wish to convert
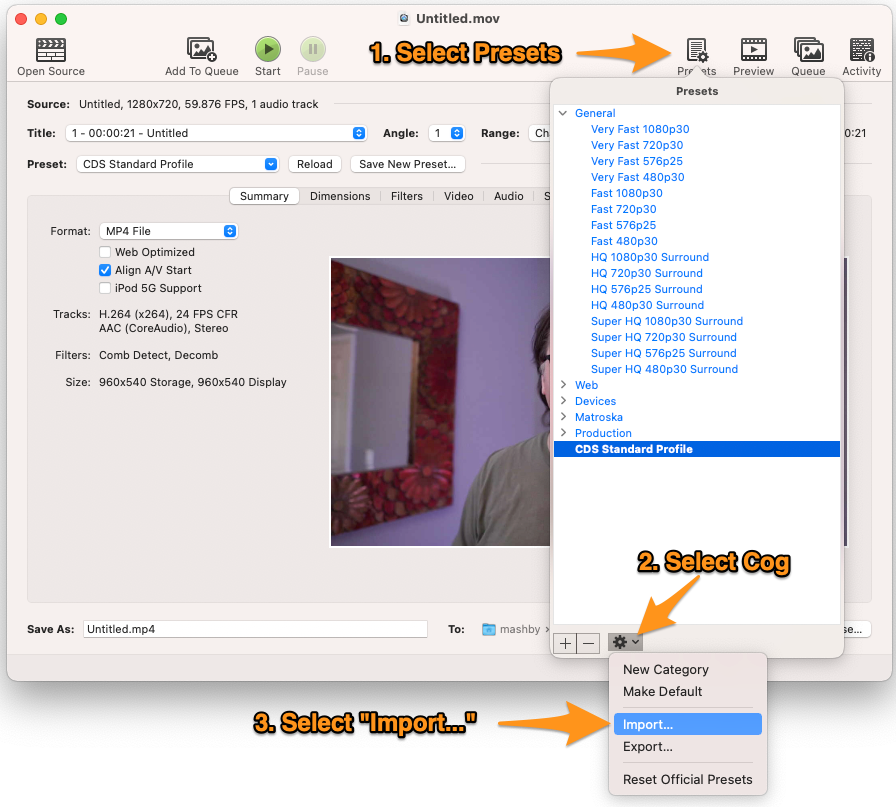
- Select “Presets” choose “Import”
- Browse to where you un-zipped the present and import the file (see images below)
- Once imported, we recommend that you set that profile as your default
- Windows:
- Mac: Highlight the profile, select the “cog” and then “Make Default” from the menu

Convert Your File
Now that you have Handbrake properly configured, here are the steps to convert your media into a web-friendly format.
Step 1: Locate Your Media
If your media is on a DVD, please insert it into your computer. If it is a digital file, locate where that file lives on your computer, or network.

Step 2: Launch Handbrake
The Handbrake is typically located on your desktop (Windows), but you may need to look under your start menu. Mac users will find it in their Applications folder.
Step 3: Select Your Source
From the top menu of the Handbrake application, choose the “Source” button. A drop -down menu will appear. Choose the option of where your media is located — either a file, or a DVD.

Step 4: Select Your Destination
Now that your source media has been selected, the next step is to choose where you want the converted file to be exported to
Select the “Browse” button to the right of the Destination File field.

Choose the folder that you wish to save your file to and provide a name for the file.

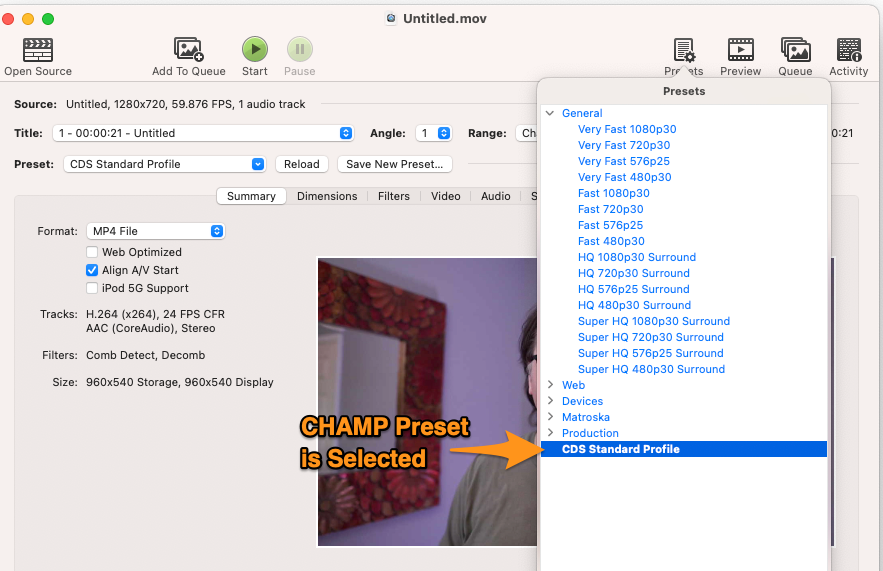
Step 5: Verify the CHAMP Preset is Select
Under the “Presets” tab, make sure that the CHAMP profile is highlighted.

Step 6: Select Start
From the top of the Handbrake application, select the “Start” button to begin converting your file.

Step 7: Sit Back & Relax
Once you’ve started the conversion process, you’ll have to wait as HandBrake does the work. The length of this process will depend on the power of your computer and the size and length of the video you’re converting.
You can monitor the progress of the conversion in the lower left corner of the application. When the conversion is complete, it will display “Queue Finished”.

Step 8: Upload Your File
Now that you have a converted file, the last step is to upload it to your account. We have an article on just how to do that right here.
Do I Have To Use Handbrake?
No. If you have other software that you prefer to use, you certainly can, just be sure that you create a custom CHAMP profile.
Below are the specifications for the CHAMP profile. This profile has been designed to reach the widest possible audience and also be mobile compatible for iPhone, iPad and Android.
Video:
- Format: H.264
- Profile: Baseline
- Level: 3.0
- Keyframe Frequency: 2 seconds
- Frame Rate: 30
- Input Size: 960×540
- Bit Rate: 1000Kbps
Audio:
- Format: AAC
- Channels: Stereo
- Sample Rate: 48k
- Bit Rate: 96Kbps
Container:
- .mp4 / .m4v or .m4a
